In this step-by-step tutorial, I will guide you on how to upload DXF files to Cameo Silhouette Studio and create stunning paper crafts. Let's get started!
Step 1: Locate the DXF files
DXF files are vector graphics files that can be downloaded from various websites, including my own online shop. When you download digital templates from my shop, they usually come in ZIP files. Inside the compressed file, you'll find a folder named "DXF" where the DXF files are stored (sounds obvious).
Step2: Open Cameo Silhouette Studio
Open Cameo Silhouette Studio.
Go to Edit >> Preferences, select the Import tab, and choose "Centered" in the "Open" option under DXF. This ensures that the imported graphics retain their original size from the DXF file. This is especially helpful when working with digital templates that contain multiple DXF files. You don't want to import DXF files with different size ratios and end up feeling like you're solving a puzzle. Trust me, it is NOT fun.


Step 3: Upload DXF Files
To upload your DXF file, click on "Open" in the top left corner and locate the DXF file from your local files to upload. Then, the imported graphics should have appeared on the canvas.


Step 4: Set Score Lines


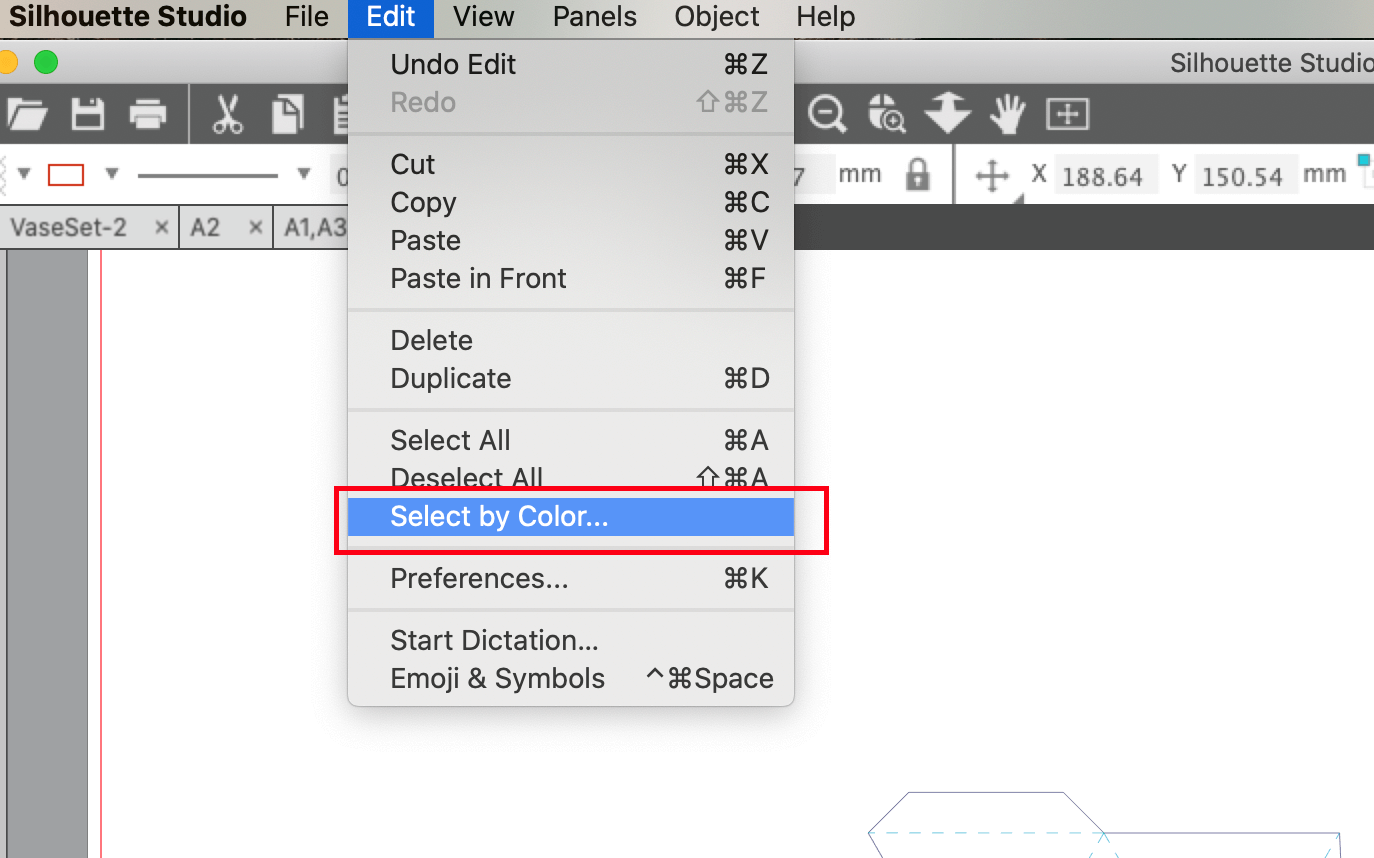
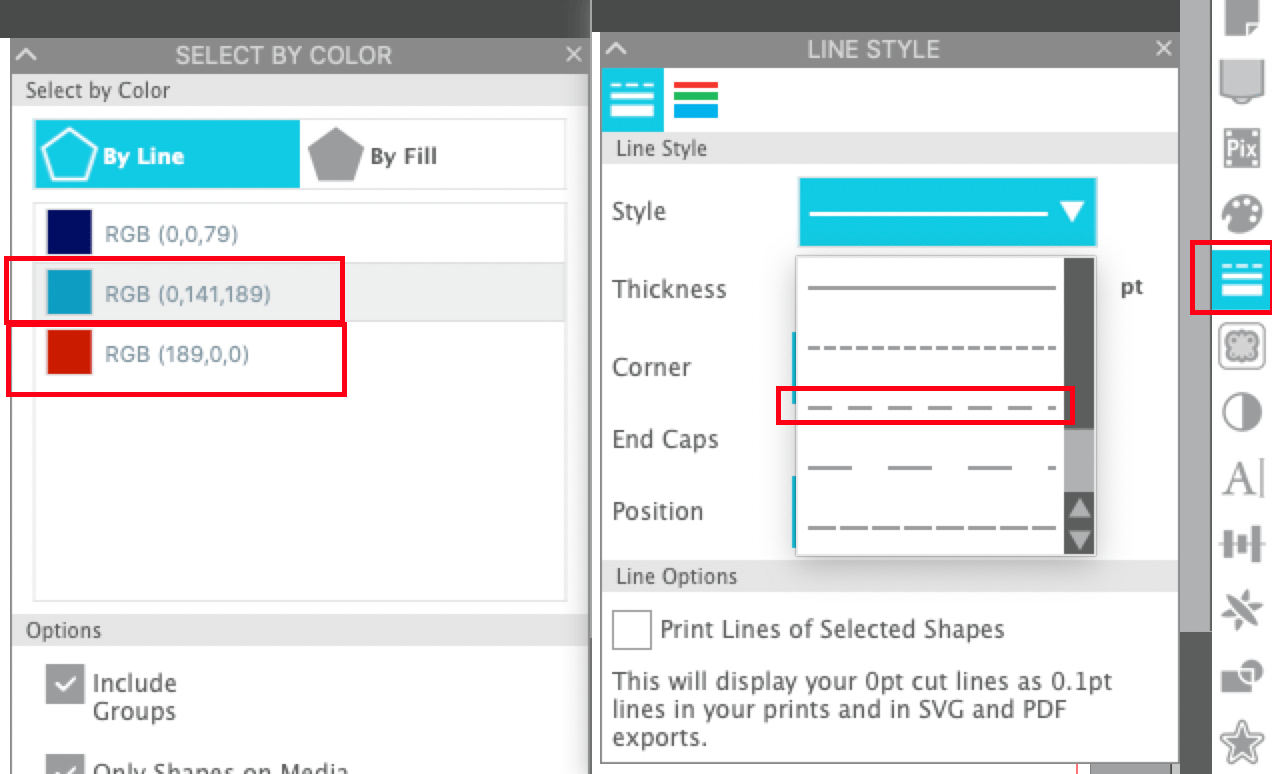
In the Edit menu, use "Select by Color" to select all the blue/red score lines. Set their "Line Style" to dashed lines. Later, simply cut all the lines, the dashed cut lines will serve as faux scores.
Option 2: Use AutoBlade to score
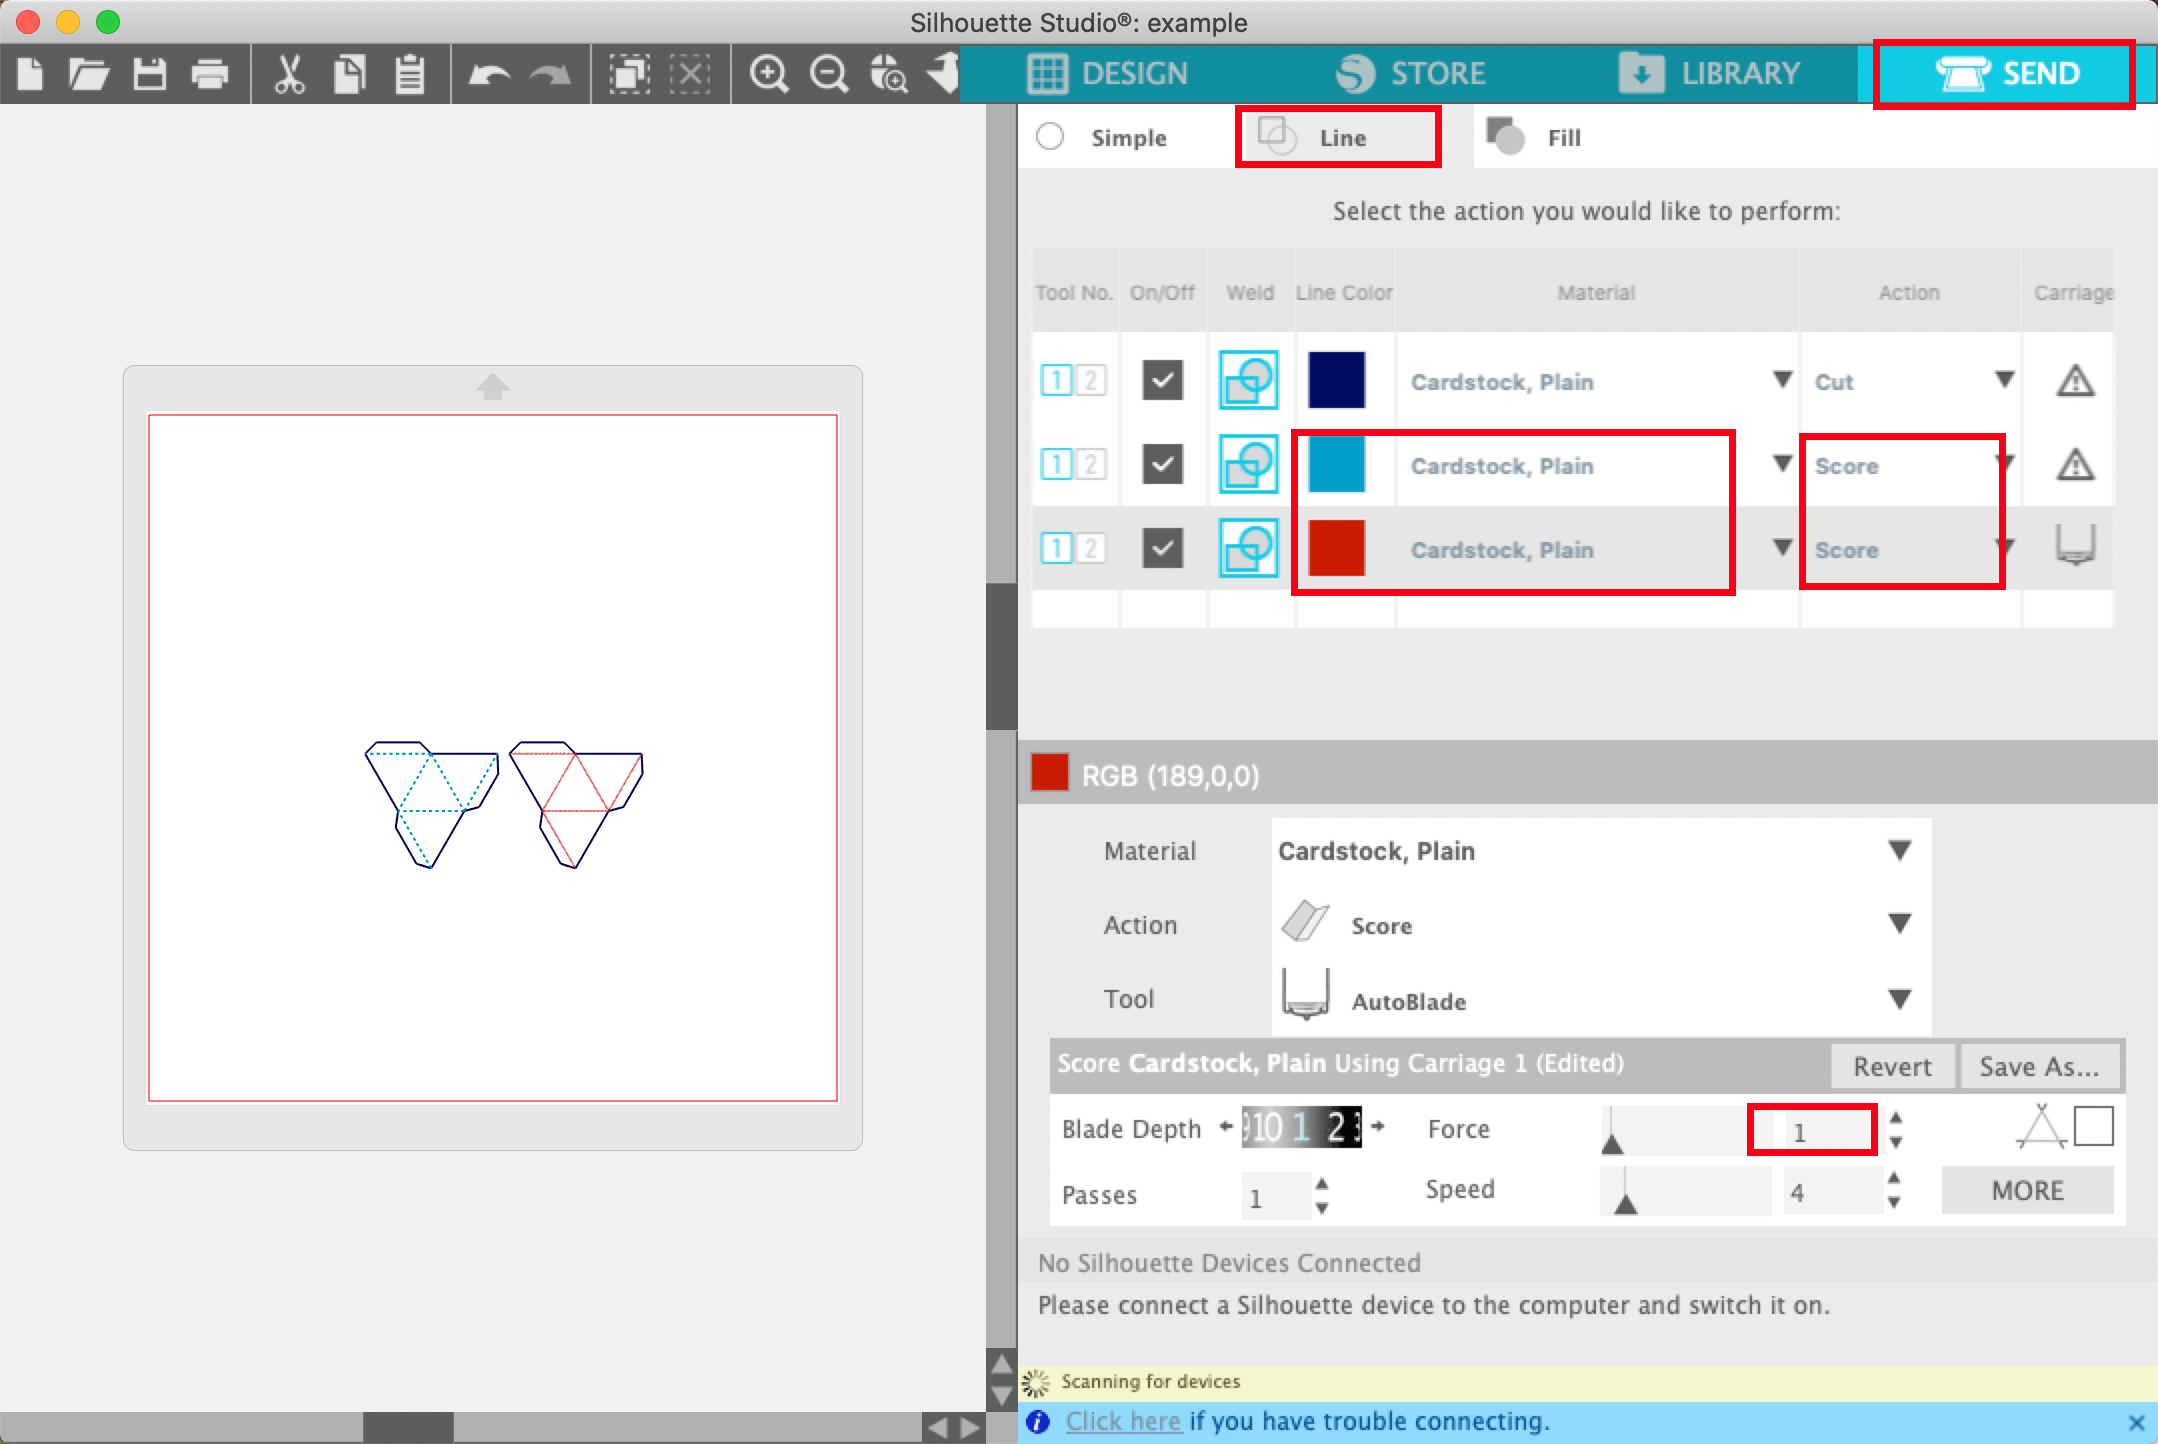
Set the cutting force of the red and blue score lines to 1 and a single pass. You can adjust the cutting force based on the paper you're using.

Set the tool for the red and blue score lines to the Ratchet blade, the cutting force to 1 and a single pass. You can adjust the cutting force based on the paper you're using. Later, the autoblade will do the cutting and the ratchet blade will do the scoring. Place the autoblade in the left slot of the blade holder and the ratchet blade in the right one.
Step 5: Send it!
Connect your Cameo machine to your computer and click "Send" in Silhouette Studio to start cutting. Make sure you have the correct cut settings for your material and blade installed.
Happy crafting!
When the cutting is complete, remove the mat from the machine and carefully remove the paper craft pieces from the mat. Now, it's your turn to start crafting!

Enjoy crafting and feel free to leave a comment to share your experience:)

